
Nikola Tesla in his LEGO lab.
Back in August I noticed an announcement for a Lego build competition at brickset.com. It was being held by Radley’s, a company that manufactures scientific glassware and laboratory instruments. The competition was to build your own science lab. It could be something wildly crazy and new, or something more classic, and there was mention of impressing them with something historical or real. Some time passed while I thought about what I could build, wanting to enter the competition. It’s always fun to have a chance to build something new and with certain guidelines or a particular topic, some direction. My mind kept wandering towards Nikola Tesla. I always thought he was cool, and wanted to do something not quite so obvious. Even though Tesla is well known, he’s not what I think people would go to first. After some google searching I found this image popping up a lot, a famous shot of Tesla sitting reading a book in his lab in Colorado Springs, CO during some experiments with his high voltage wireless electricity and coils.

Nikola Tesla conducting his famous high voltage experiments in his lab.
I also found a couple other images from different angles of the same space that I would use for reference. Even though I was concentrating on recreating this particular shot (above), I wanted to fill the lab out and complete the idea and make a nice display piece.


This screamed out at me as the perfect scene to try and recreate in Lego. I started with doing a couple of the coils/transformers shown in the image, just to get a feel for the size and what parts would work, and that I could do it really. Then I began the floor layout, realizing quickly with all of the pieces I needed to include I would need more space than a standard baseplate. Combining a full baseplate (32×32 studs) along with a half baseplate (16×32 studs) I felt I could include all of the things I wanted and keep it to a reasonably realistic looking scale.

The very beginning of the lab layout. (Stormtroopers looking on, wondering “WTF is going on out there?”.)
It was a fun process, using trial and error to get the best looking coils and stands, trying out different parts and building methods. It was also fun tearing apart various Lego sets and diving into the bags of unbuilt sets to pilfer the parts I needed. There is a very handy website called Rebrickable that allows you to keep track of all of the Lego sets you own, and it keeps inventory of all the sets, so as you look up a particular part you are after, you can see how many you have, in which colors, and in which sets, so you can quickly find the part you are looking for. This site was invaluable as I never would have found the parts I was looking for in a timely manner, or even known what I had! I took from A LOT of different sets to build this, even completely dismantling half of the Pet Shop modular, requiring all of those brown bricks for the walls.

Half of 10218 Pet Shop modular awaiting dismantle to become the walls of Tesla’s Lab.
Here are a few shots of the build in process, you will notice certain things changing along the way.
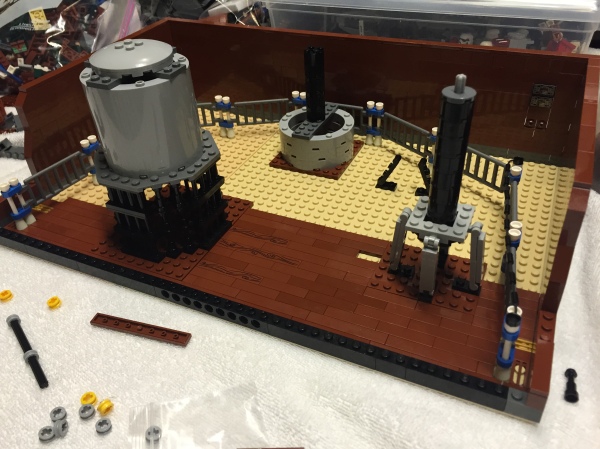
Started tiling floor, early ideas of coils and larger transformer still in place.
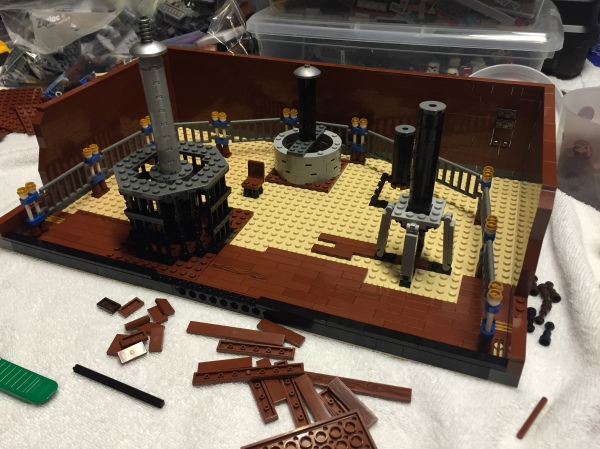
Adjusted color details of top/bottom of fencing, changed design of main transformer to be more accurate at the base.
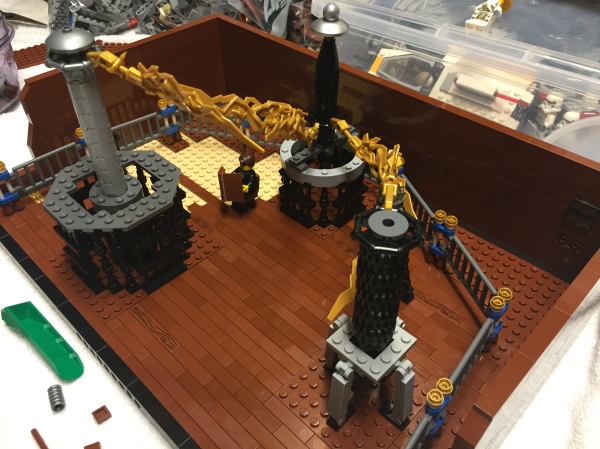
Tiled out more of the floor space. Added Tesla reading book in his chair. Altered designs of all coils/transformers, started playing around with how the electricity would work.

Added left side of lab equipment according to reference photo.
I changed the designs as I went along of the different coils and transformers. Partly because I came across certain parts that I felt would work better and partly because I felt I needed to make things more accurate. I also had to deal with a limitation of certain parts, so that meant deciding how which piece would be built a certain way. For example, I had several different stands holding coils, but each one is different. The primary reason for that being I only had a few of a particular part, so the next stand would require different parts to make it work. I also wanted to give some variety to the coils and equipment. Most everything is black and round. But instead of using just round 2×2 bricks in black, I opted to change one coil out for all tires, or using 2×2 round plates instead or in conjunction with bricks, or finding technic connectors for a different size, and also using modified 2×2 round bricks to add some texture. Changing the solid outer shell of one of the transformers to different fence pieces to make it look like more of a cage, like the photos depict, was also a smart move I believe, and meant a great deal of ripping apart sets, mostly more modulars, to find enough pieces.
OMG, you guys…I just realized how incredibly nerdy I must sound, to go into such detail about how I built a friggin’ stand or tower while using Lego parts language. Sheesh! Oh by the way, MOC stands for “My Own Creation”, it’s one of MANY acronyms found in the world of Lego speak.
So, obviously the elephant in the room when starting this project was, how was I going to do the “lightning”? I honestly wasn’t sure at first, even when I was halfway done with the build I wasn’t sure, I was just focusing on getting a layout that I was satisfied with. I had begun to think I could somehow “fake” the electricity in the picture as long as I had everything else looking good. But then I remembered the rules, “it must be built entirely out of Lego!”. Just so happened the latest Lego catalog had showed up in the mail, and as I was ignoring my children and browsing it I noticed a set that had lightning bolt pieces! And a lot of them! There was a new Ninjago set called Master Wu Dragon, and this set became the first set I ever bought not for the set itself, but for the pieces it contained. I had officially reached a new level in AFOL-dom. (AFOL = Adult Fan Of Lego) I had a moment, like a celebration, I could hear trumpets playing, Angels singing, kids screaming — oh shit, the 3 year old has the baby in a headlock again…
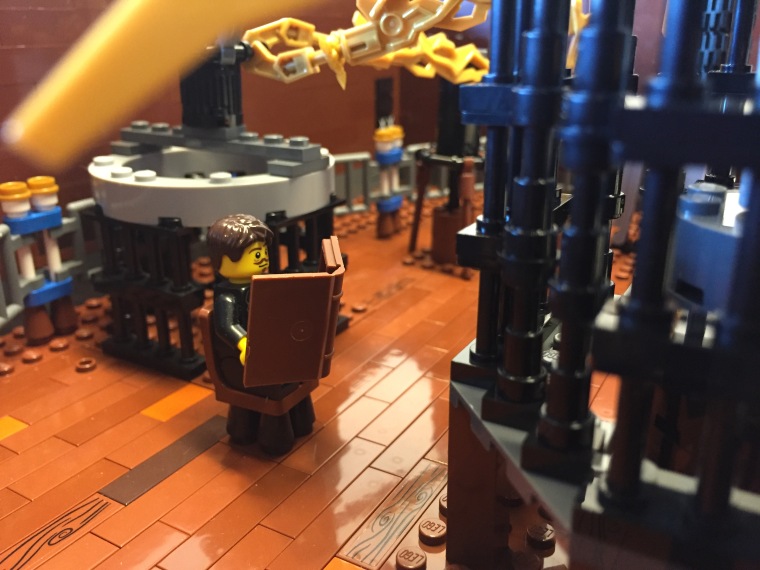
Alright I’m back, everyone is good. The girl is on the couch with a popsicle watching a movie and the boy is in the Jumperoo with his Sophie giraffe, chewing the paint right off of it. I couldn’t possibly leave out the sole mini figure in my set here, Nikola Tesla finally in Lego form. I actually did spend some time looking through the minifigs I owned trying to come up with something that would resemble him, hoping I wouldn’t have to go purchase some rare mustache head or something. Using Brickset’s amazing online tool of keeping track of the mini figures you own I was able to easily browse what I had without digging through bags or sets. My Nikola Tesla is actually a combination of three separate mini figures. I used the body of Abraham Lincoln, along with the head of William Shakespeare, and the hair piece of Marty McFly. So, this is pretty sound evidence that Nikola Tesla is actually the historical love child of Bill Shakespeare, Abe Lincoln, and McFly. And here you probably woke up thinking you weren’t going to learn something today. Heh. Stupid.

There was a good period of going back and forth fiddling with the build, changing things, changing things back, moving things around, all of that. It was all good fun, and it was therapeutic for the OCD “Lord Business” part of me to mine numerous sets for parts, not knowing at all when they might return to their 100% complete status again! As I unload a bunch of final pictures for you, pictures that I submitted to the competition officials over at Radleys.com, plus some extras, I just want to thank Radley’s, Brickset, and Rebrickable. Nobody asks for these “thank you’s” or links because frankly, they don’t know who I am. But I sincerely couldn’t have created this without all of them existing, doing what they do on a daily basis, and so they deserve thanks in the credits of this creation. Radley’s for hosting the competition, that’s very cool of you and a great way to get your name out there and have some fun while doing it. Brickset for covering the news of this opportunity and therefore bringing it to my attention. You have successfully allowed people from different circles to cross paths and become aware of each other, very cool. Brickset again for having the tools available at your site to help me create this display piece. Also can’t forget Rebrickable, invaluable resource for Lego creations. Nothing gets done in Lego creations without your site and the service it provides in keeping track of so much information. Pretty awesome. I’d still be digging through Legos and who knows what my kids would be up to if it weren’t for your time saving tools. 😉
Final Images of my LEGO Tesla’s Lab:
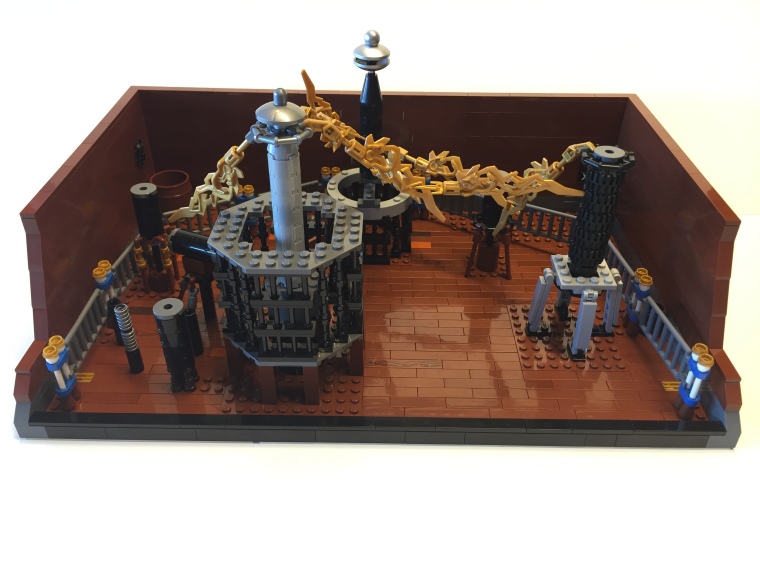
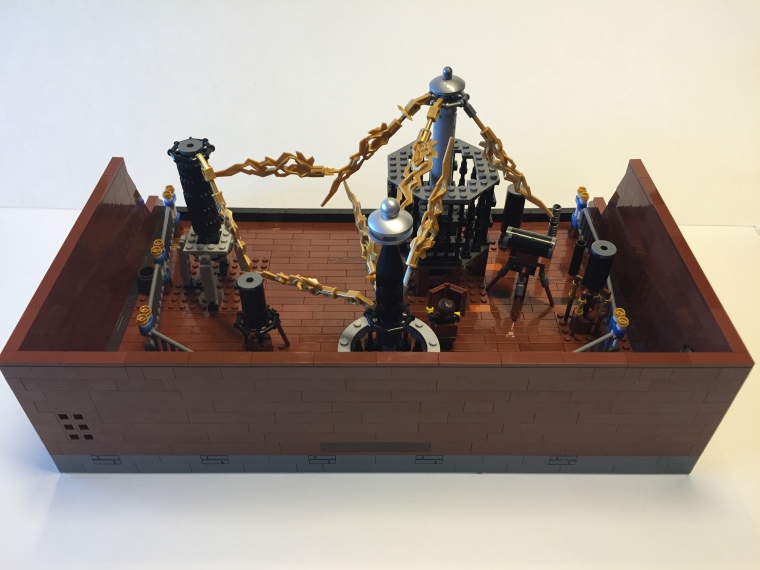
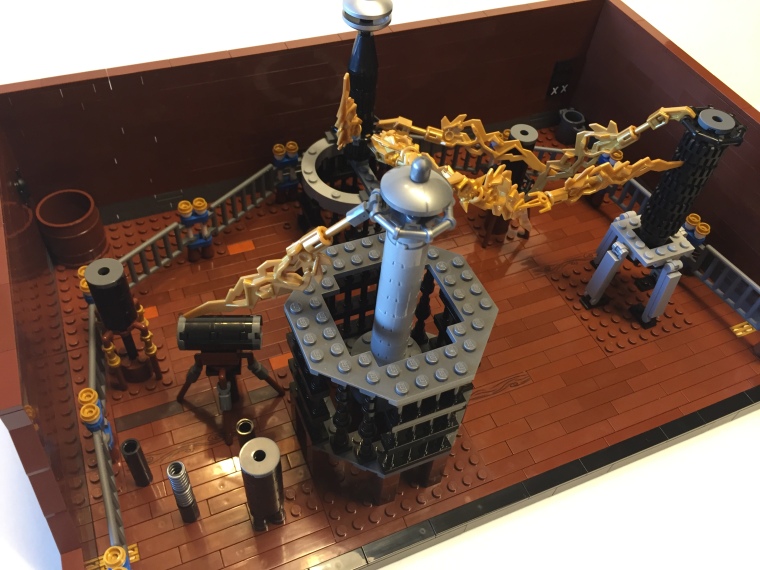
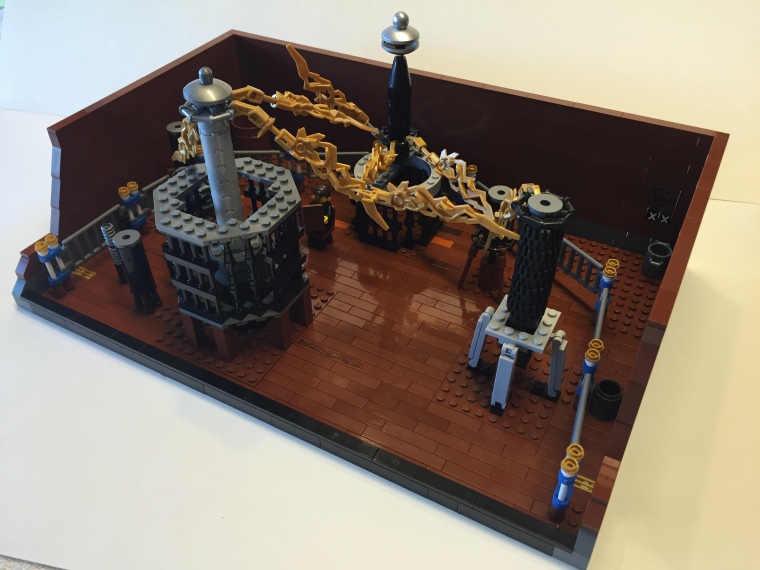

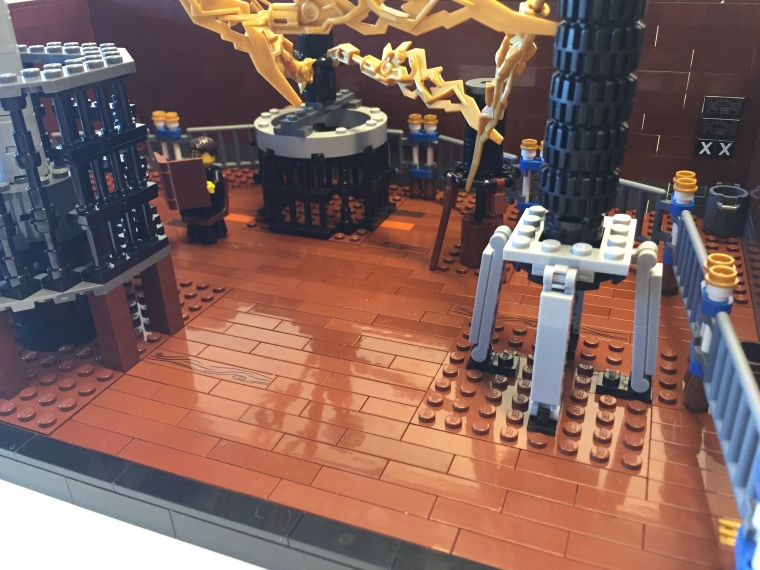
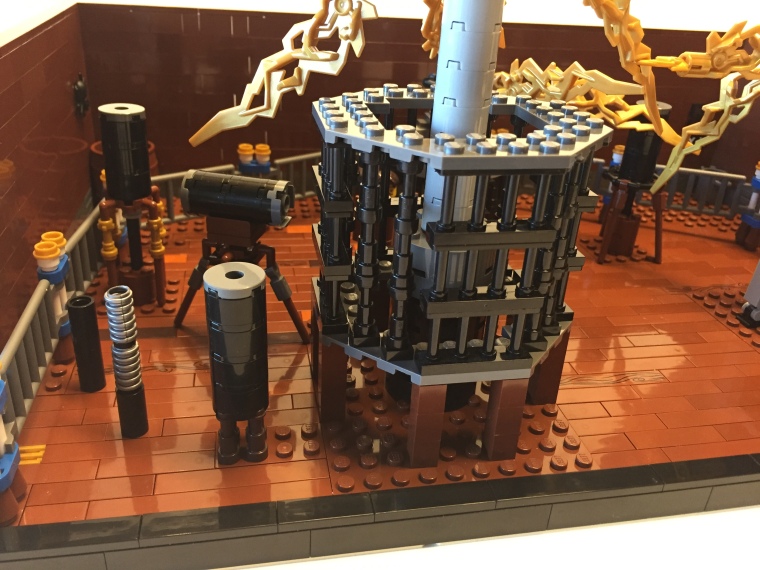


I hope you enjoyed my breakdown of Tesla’s Lab recreated in LEGO. I definitely hope I win! But if not, without this competition I never would have thought to make this, so I owe the existence of this creation to Radley’s, forever grateful. Thank you.
j.


")
")
")
")
")
")
")
")
")
")
")
")
")
")
")
")
")
")
")


