I remember around this time I was thinking it was time to try something a little more “standard”. Maybe I was sick of looking at complicated fabric prints all the time and the thought of doing something more well known, a classic really, was appealing. I also wanted to see if I could do it, a more fundamental paint and finish. Since I had been primarily focusing on honing my material finish skills, I had also been learning some universal finishing techniques that I wanted to put to the test, as well as add a new skill to my repertoire (<– spelled it right the first time, no red line BOOM!), grain filling.
I should also mention this began as a project that I was going to keep for myself. I wanted a classic guitar and as a lefty they’re tough to find, so I was going to make myself one that looked like this Fender ’52 replica.

This particular configuration was known as a “blackguard” because of its black lacquered pick guard, and the finish associated with it is butterscotch blonde. Butterscotch for the color, blonde because it is slightly transparent to show some of the grain of the wood.
So I headed to eBay to see what kind of guitar bodies I could find. I found a seller that made very nice quality bodies and purchased a left handed Tele body made from Ash.
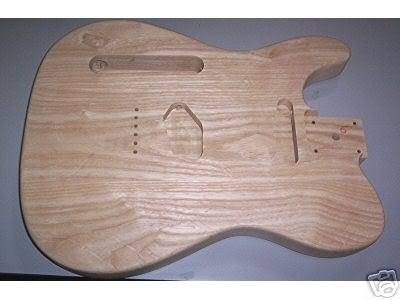
Ash is a more porous wood that would require additional prep before it would take a finish. Earlier I mentioned grain filling. This is exactly what it sounds like. Take a grain filler which is a paste that you rub onto the guitar and pack it into the pores. Along with some sanding sealer coats and block sanding this will give the guitar body a completely flat impenetrable surface with which to lay your paint and clear coats upon. Without this important step, your finish would sink into the wood and look horrible, thereby embarrassing you in front of anybody that saw your guitar. Your grandmother would probably say “good job sweetie!” But under her breath say “I would have grain filled it for sure.” Here are a couple shots after grain filling.


You can see how there’s a nice sheen to it and it’s completely flat and level, ready to accept paint. Prep work is so important to the finished product. Difficult to have the patience sometimes because you’re excited to get to the painting which makes it look like you did something but I promise you that anything that isn’t perfect prior to painting or clear coating will show through and bum you out down the line. Cutting corners = bad times.
I was gonna do this one right with an all lacquer finish so of course headed over to the Guitar Reranch for the paint. They have this color perfectly dialed in. And in easy to use spray cans! After shooting it to my desired grain show through I was left with this.
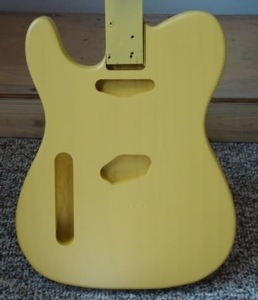
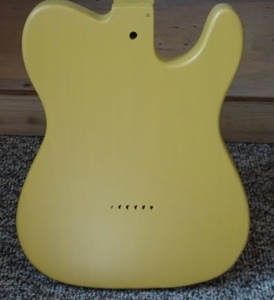
After finishing with clear coats, waiting for the lacquer to cure (about 30 days), my least favorite part of refinishing wet sanding and finally polishing, I was rewarded with a very acceptable butterscotch blonde ash Telecaster style body made for a lefty.

As it turns out, this is where the project ended for me. I decided not to complete the guitar for whatever reasons, most likely financial or realizing I had too many guitars anyway. So I sold this as a replacement body for someone else’s project, all finished and ready to go! Never saw what came of it though, sadly. Always tough to see them go! 😎
j.

Leave a comment